
This is a tutorial that requires some brain power. The sewing is simple; it's the logic needed that can cause some heartache.
Shower curtains are practically a necessity for anybody's life. We often to go a store and buy a shower curtain that we don't really like but know that we need. Why not walk into your bathroom and fall in love with how your shower curtain pulls together every other part of the room! It takes up the most space, so it should be the center of attention (Good Attention!!)
Today, I'm going to show you how you can make your own shower curtains. Nearly every step can be revamped to fit your own style! Let's get Started.
Items Needed:
- 5 yd.s of fabric - Typical sewing supplies
- 3/8" grommets - A friend with good math/logic skills.
- Grommet Pliers

A standard shower curtain is 72x72; change your measurements however you want. B/c of hem allowances, you need enough fabric to make 80x81 add 8" to width and 9" to length. So buy a heap of fabric and start off by cutting the top so that it is even. A great way to do this is by making sure the pattern matches.
 Step Two:
B/c most fabric doesn't come in a width more than 60", you'll need to cut two pieces of fabric that are each 81" long. MAKE SURE THE PATTERNS MATCH. Where ever you cut the pattern at the top to even it out, needs to be the same part of the patten that you cut for the second piece's top. You will have to sew them together, and you want it to look like one piece of fabric. This also means that you may have to buy extra fabric to make sure you have enough to match patterns. If a pattern repeats every 4 inches, buy 4 extra inches of fabric!

Now that everything is cut, lay the fabric with right sides together. Pull back the fabric on top and find where the pattern matches. Mark that spot on the WS of the top fabric, lay the piece back down, and pin it in place. Do this every few inches or wherever the pattern works best to help you match. Pull the fabric back after each pinning to make sure it looks correct. (For some patterns that have a central pattern, match the pattern in the middle of the design to avoid giving the finished curtain a non-centered look). This is the hardest, most obnoxious part... but STICK WITH IT!

Sew with right sides together, following carefully where you have pinned. Once it is sewn, open up the fabric to see if the pattern matches after sewing. Trust me; it takes practice. It took me many tries before I got it perfect my first few times. But don't give up! It's worth the work to have a beautiful shower curtain!

Step Five:
Once you have mastered the pattern, the rest is a breeze! I like to surge along where I have already sewn. It cuts off my extra fabric, gives a professional look, and gives that middle seam some extra strength. Be careful not to catch extra fabric while you surge! Also make sure you surge with right sides together =).
Step Six:
 Now your fabric is going to be extra wide, and remember we need 80x81 before our hems. So from your newly finished middle seam, measure out 40" on each side and cut off the extra fabric. If you have a repetitive pattern, cut off matching each part of the pattern to make sure it is straight. After this step, I like to serge the edges just to give a professional look, but it isn't necessary.
Step Seven:

For the Sides: iron 1". (First picture) Next, Iron a 2", matching the pattern and pinning every foot (second picture).
For the Bottom: Do the same as for the sides, 1" followed by 2".

For the Top: Iron 1", followed by 3.5". The Top needs to have a wider hem to support grommets or button holes to hang your curtain up.
Sew your hems, remove pins, trim off extra thread, and iron all hems.
 Step Eight:
Scotch guard your shower curtain to protect the fabric. Nobody wants a smelly shower curtain. Now all that is left is to add the finishing touch of grommets or buttonholes. For this tutorial, I'll show you how to do small grommets for curtain hooks. In following tutorials I'll explain large grommets for curtain rods and button holes with ribbon!
Start by measuring along the seam, 1.5" from the top and make a pencil mark. Measure towards the middle about 6" and make another mark. Typically, you want 12 marks for grommets which will give you about 6" in between each mark. Remember that you have a seam in the middle, so you will have 6 marks for each side. Make sure the marks on each side of the middle seam are of equal distance from the seam (typically 3" from the middle to give you 6" from mark to mark). This is mostly trial by error; 6" is normally about my magic number. Measure everything twice before you start cutting the marks. This is an easy step, just takes some extra thinking to get the 12 marks to spread out evenly.

Now carefully cut a + where each pencil mark is at. Small grommets are small (duh) so you only need small cuts. If you can poke your pinky through you're getting a little scissor crazy =).
 Step Ten:
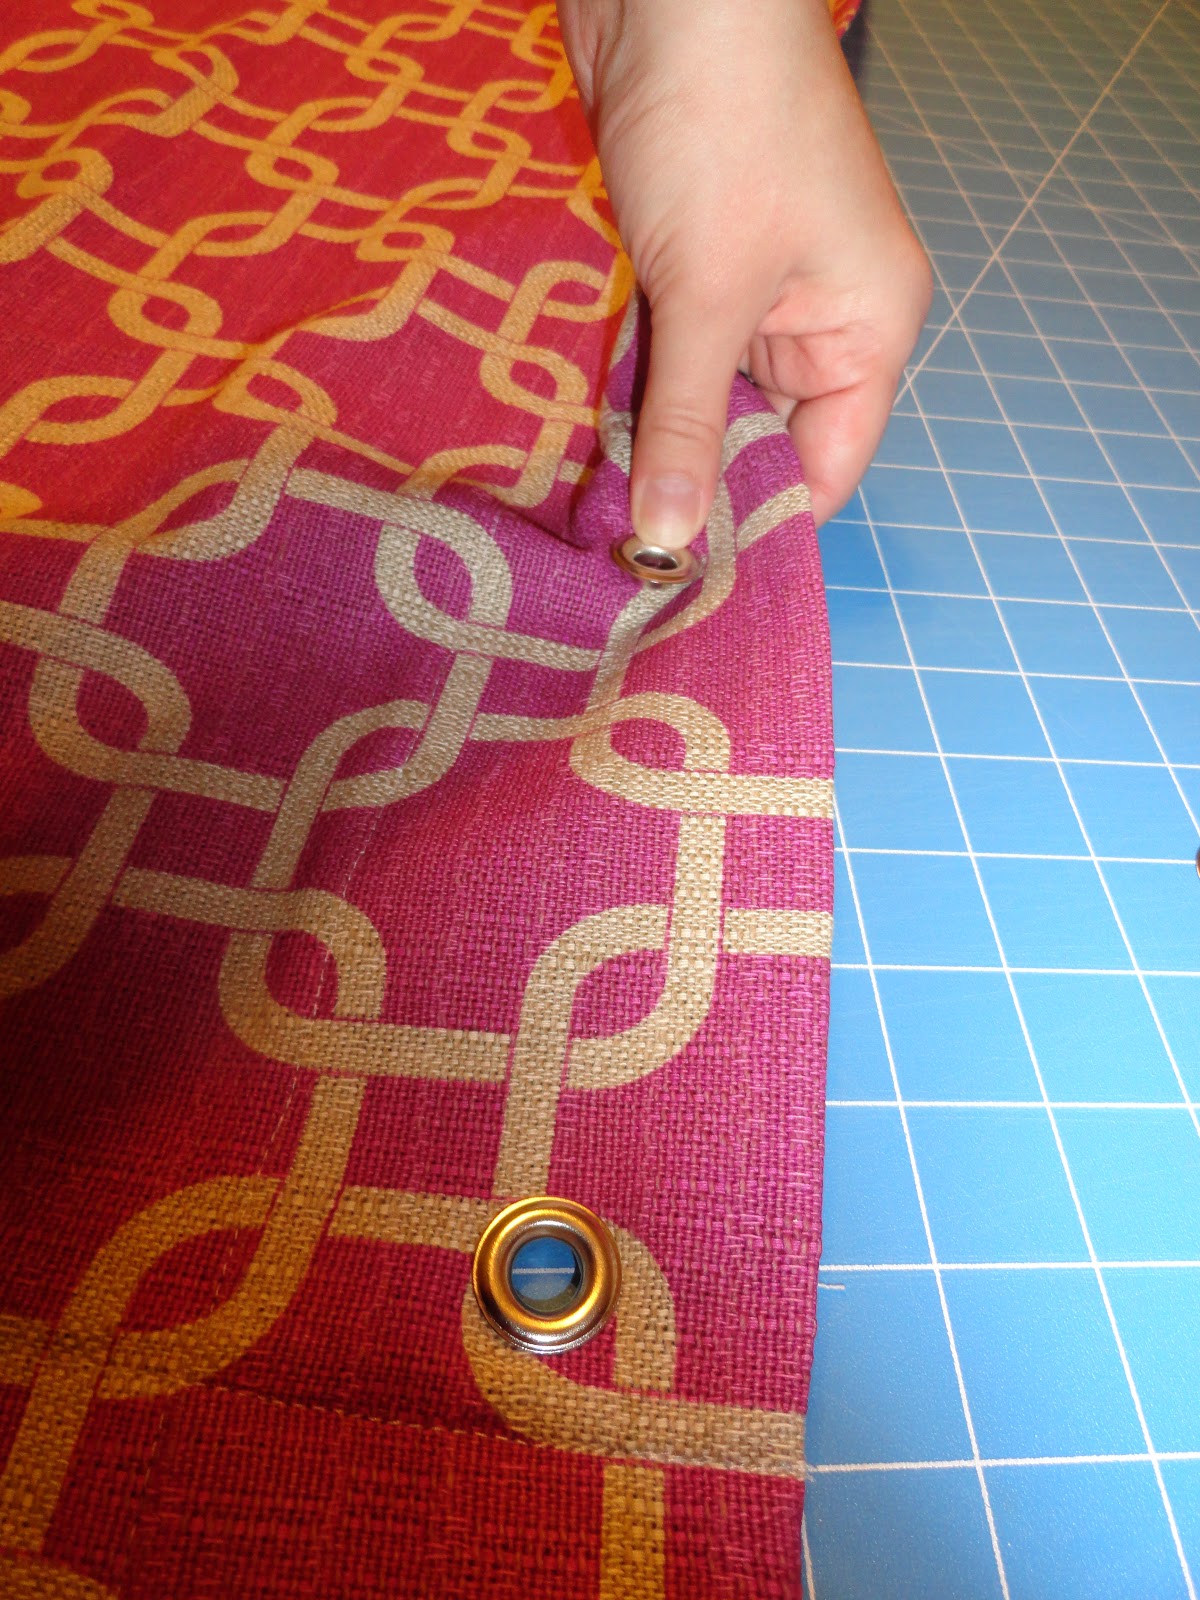
You place the end with the raised back through the front of your curtain where you cut the hole. Then place the flat ring onto the back of the curtain. Using the grommet plier, you place the metal end on the back of the rings and SQUEEZE. It will flatten out the raised part of the grommet around the flat piece on the back... keep it secure on your fabric. Now you can hang up your new masterpiece in your bathroom!!!
Later, I will explain Large grommets (Much simpler and easier to install) and button holes with ribbon!
P.S. If you can master this, It's proven to be a lucrative business! Go get 'em!
No comments:
Post a Comment